Welcome to the world of Intelligent and efficient inventory management with SKULabs! If you’re new to this powerful tool, you’re likely eager to dive in and start incorporating your order fulfillment and inventory tracking processes. This blog post will guide you through the initial steps of onboarding with SKULabs, ensuring a smooth and successful start to your journey. Once these simple steps are completed, reach out and schedule your first onboarding account review. If you have not spoken with anyone on the team before you have signed up, we recommend reaching out to have brief conversation so we can put a game plan together that would work best for you.
SKULabs
SKULabs is an all-in-one inventory management and order fulfillment solution designed for eCommerce businesses. We integrate with multiple marketplaces, shopping carts, POS systems and shipping carriers, providing a centralized platform to manage your inventory, orders, and shipments. Whether you’re a small startup or a growing enterprise, SKULabs can scale to meet your needs.

Have Questions or Need Assistance?
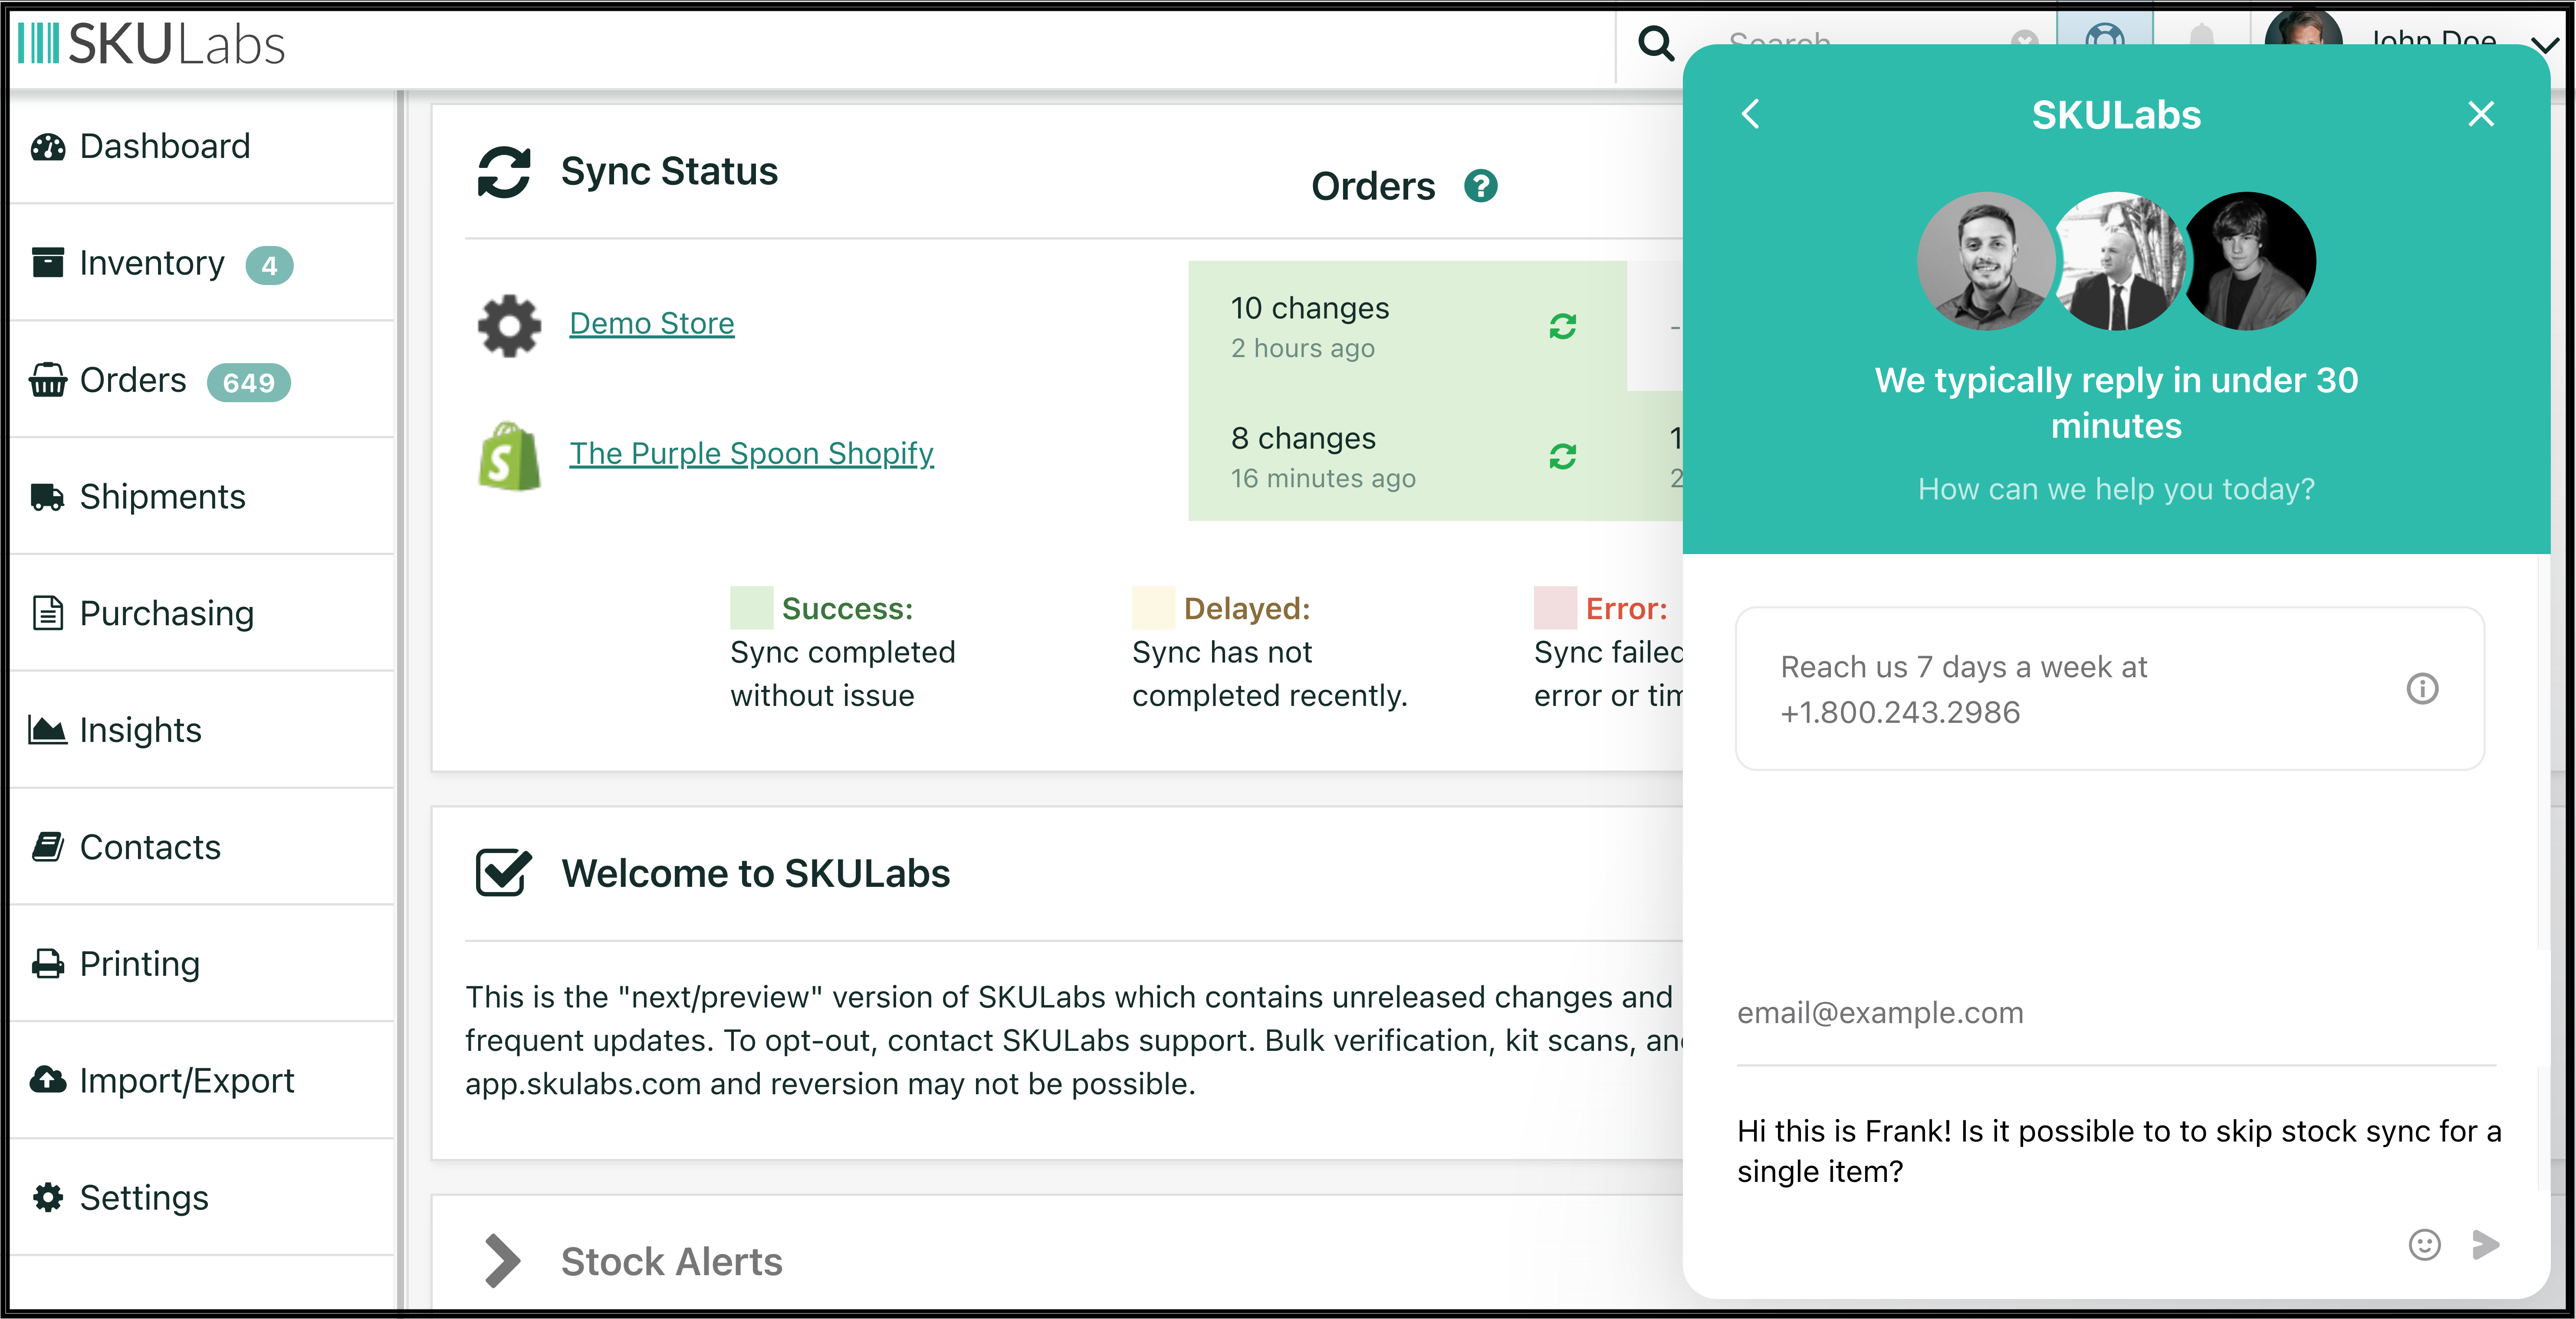
Remember at any time during your setup, if you have a question or need some guidance, you and your team always have quick access to your account manager through our in-app chat system! simply click your name at the top right, and click on contact us. This will open the chat dialog where you are free to reach out with any questions you might have. We are here to help you get set up at every step of the way!
Step 1: Setting Up Your Account
Sign Up and Choose Your Plan
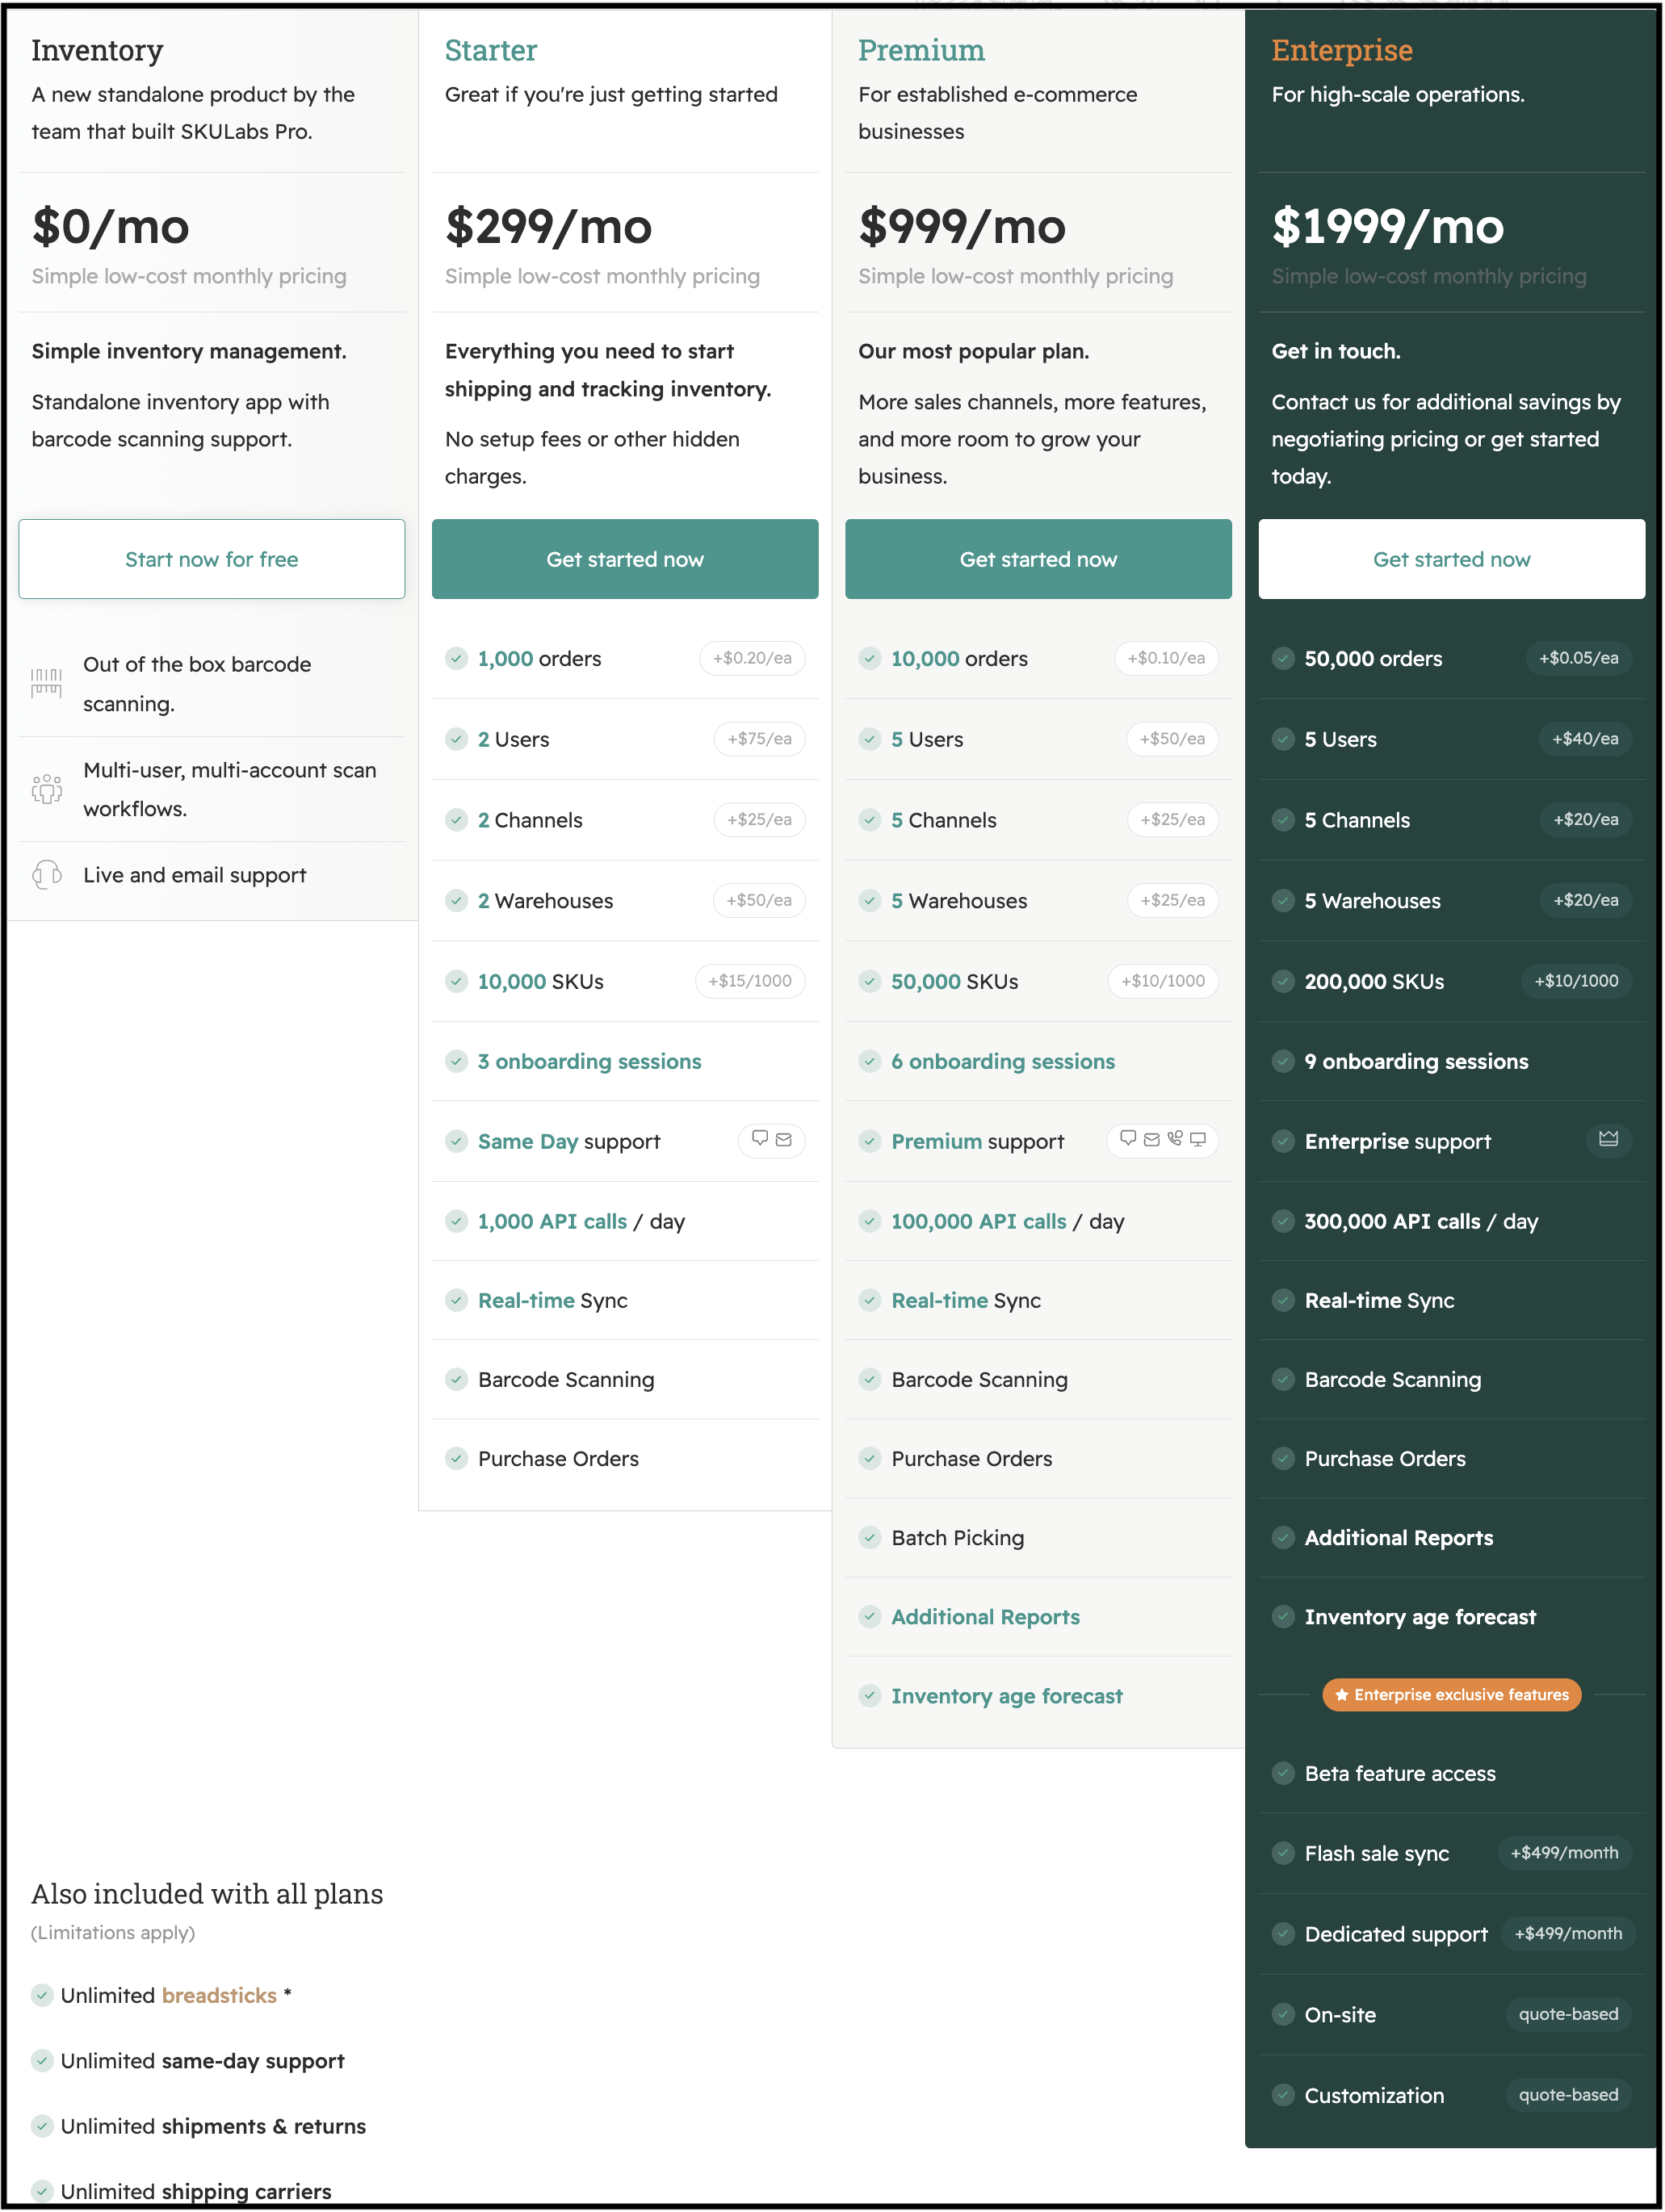
First things first, sign up for an account on the SKULabs website. Choose a plan that fits your business size and needs. We offer various pricing tiers, so consider factors like the number of orders you process, the number of sales channels you are using, and the number of users you will need. These plans are designed to be flexible, so no need to jump to a higher package if you go over the order limit or want to add an additional store or user.
Our pricing page shows the amount given on each package and the cost for the add-ons such as additional channels, orders, users or warehouses. For example, a Starter plan that does 1100 orders per month will only be charged for the additional 100 orders ($20). This gives our users the flexibility to grow at their own pace without having to jump to higher packages once the limits have been reached.
Account Configuration:
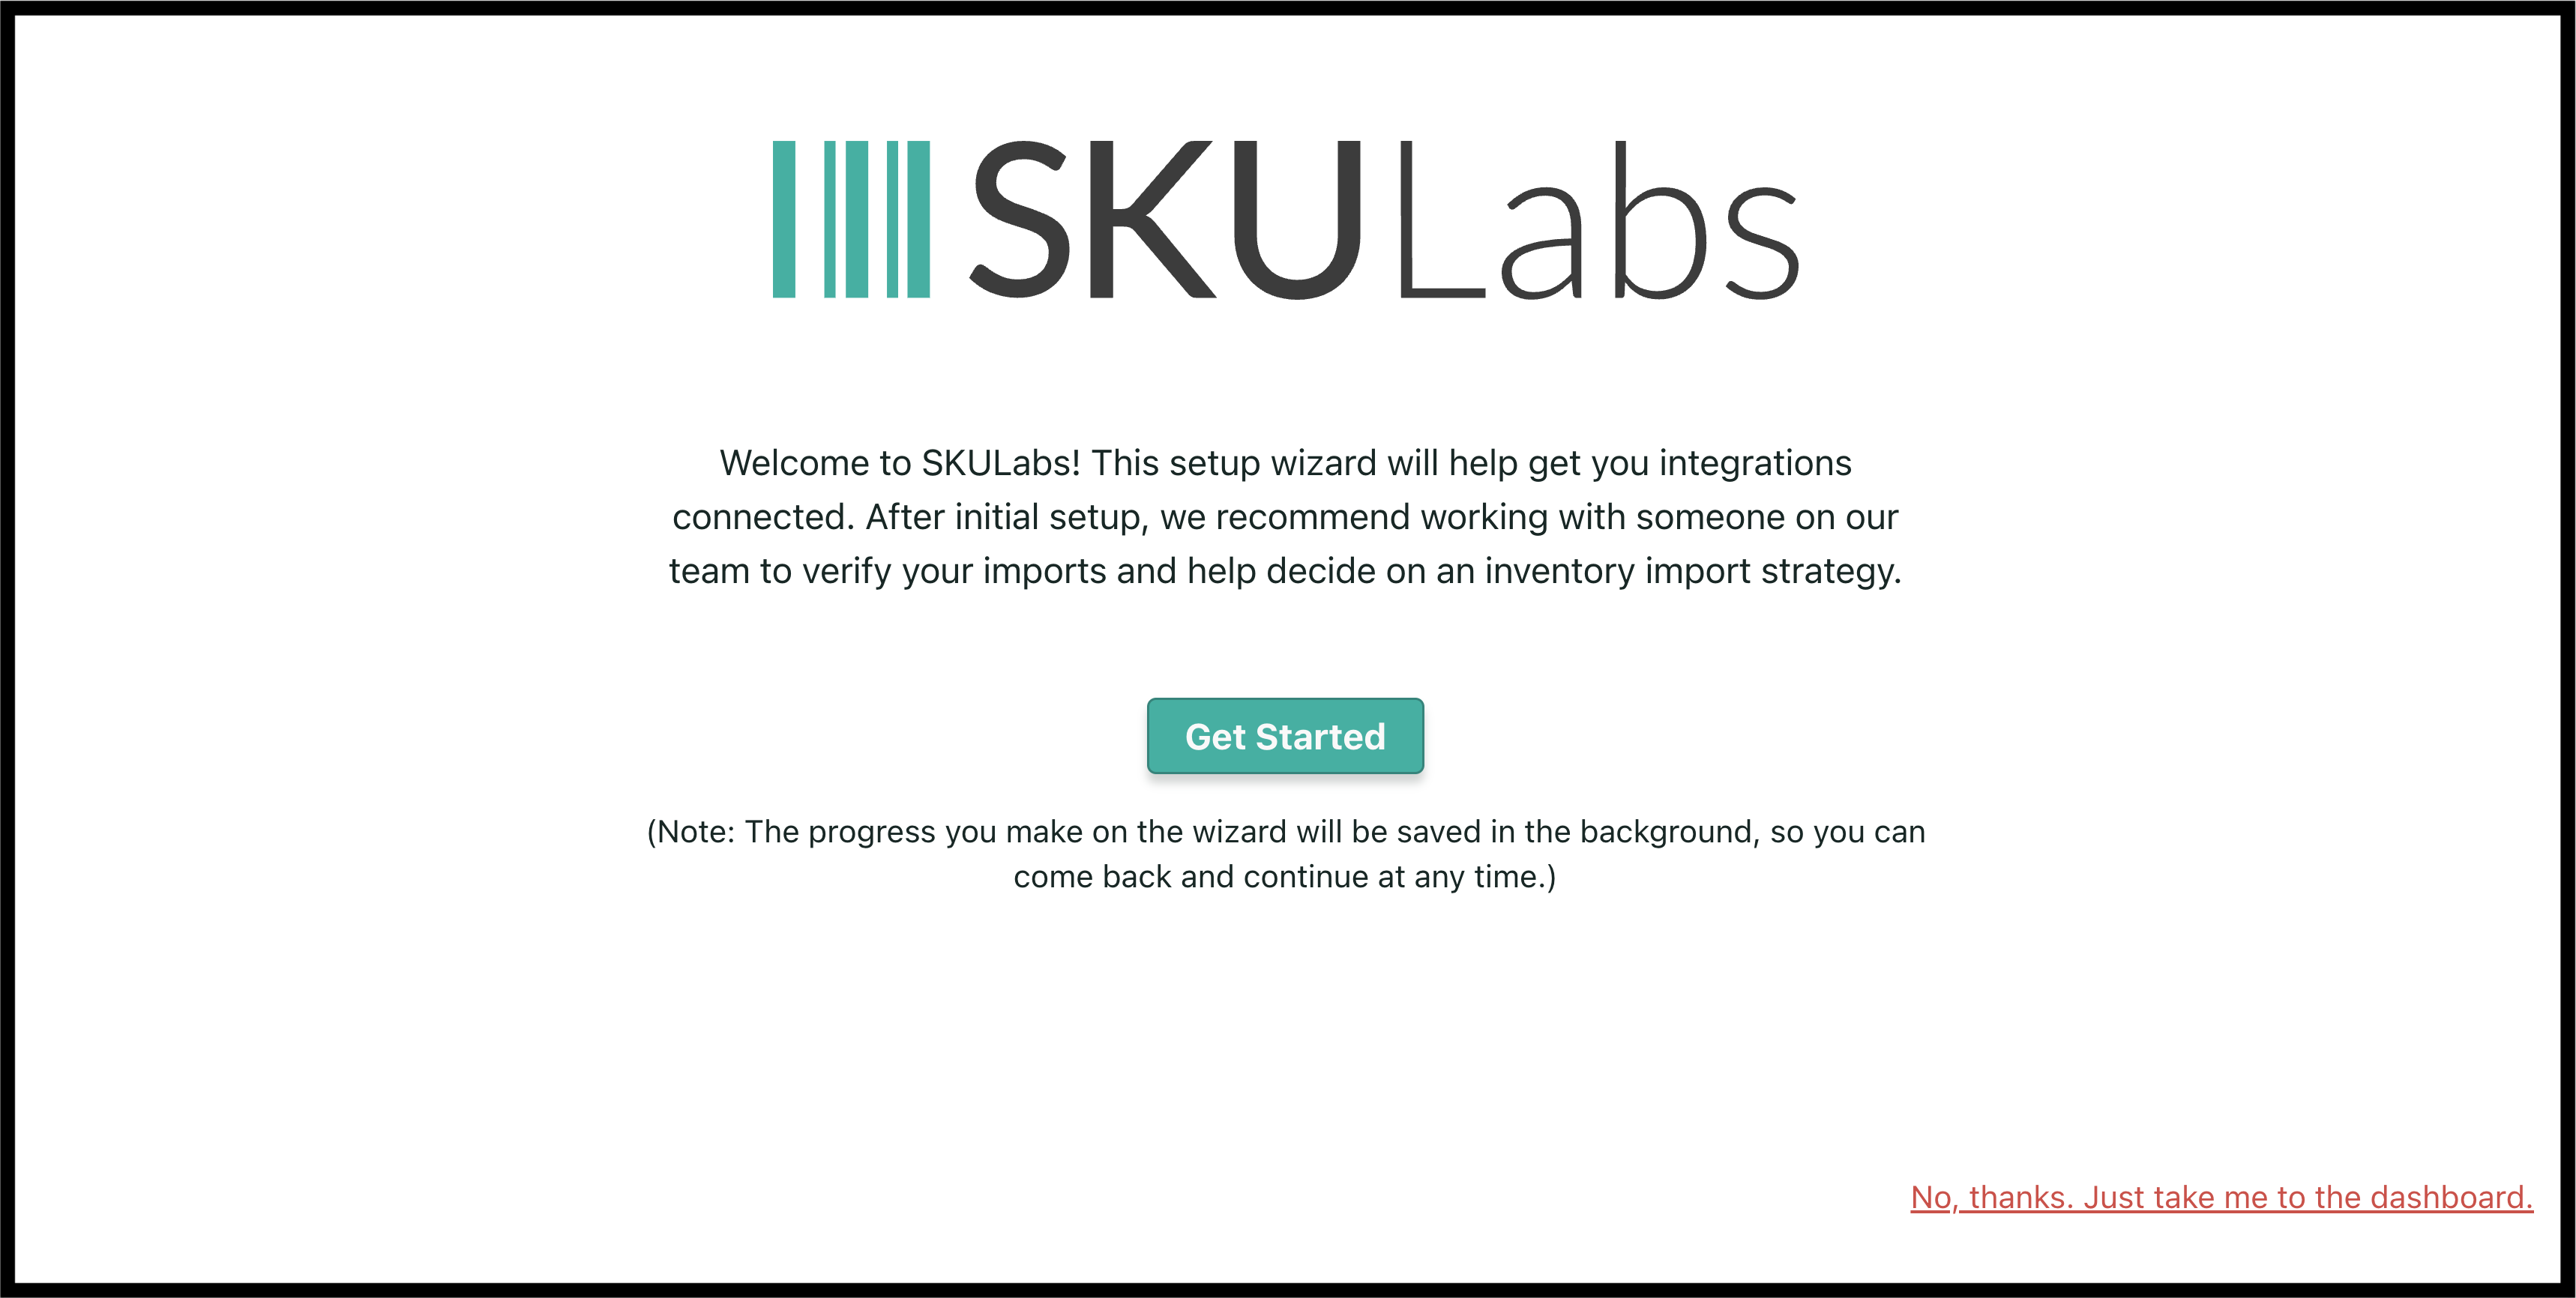
Once signed up, and you are starting your initial onboarding with SKULabs, the in-app wizard will guide you through an initial setup process. This includes setting up your company profile, adding users, and configuring basic settings like time zone and currency. Click on Get Started and follow the in-app guide or you can use our help article to get the ball rolling and start onboarding with SKULabs!
Step 2: Integrating Sales Channels
Connect Your Stores
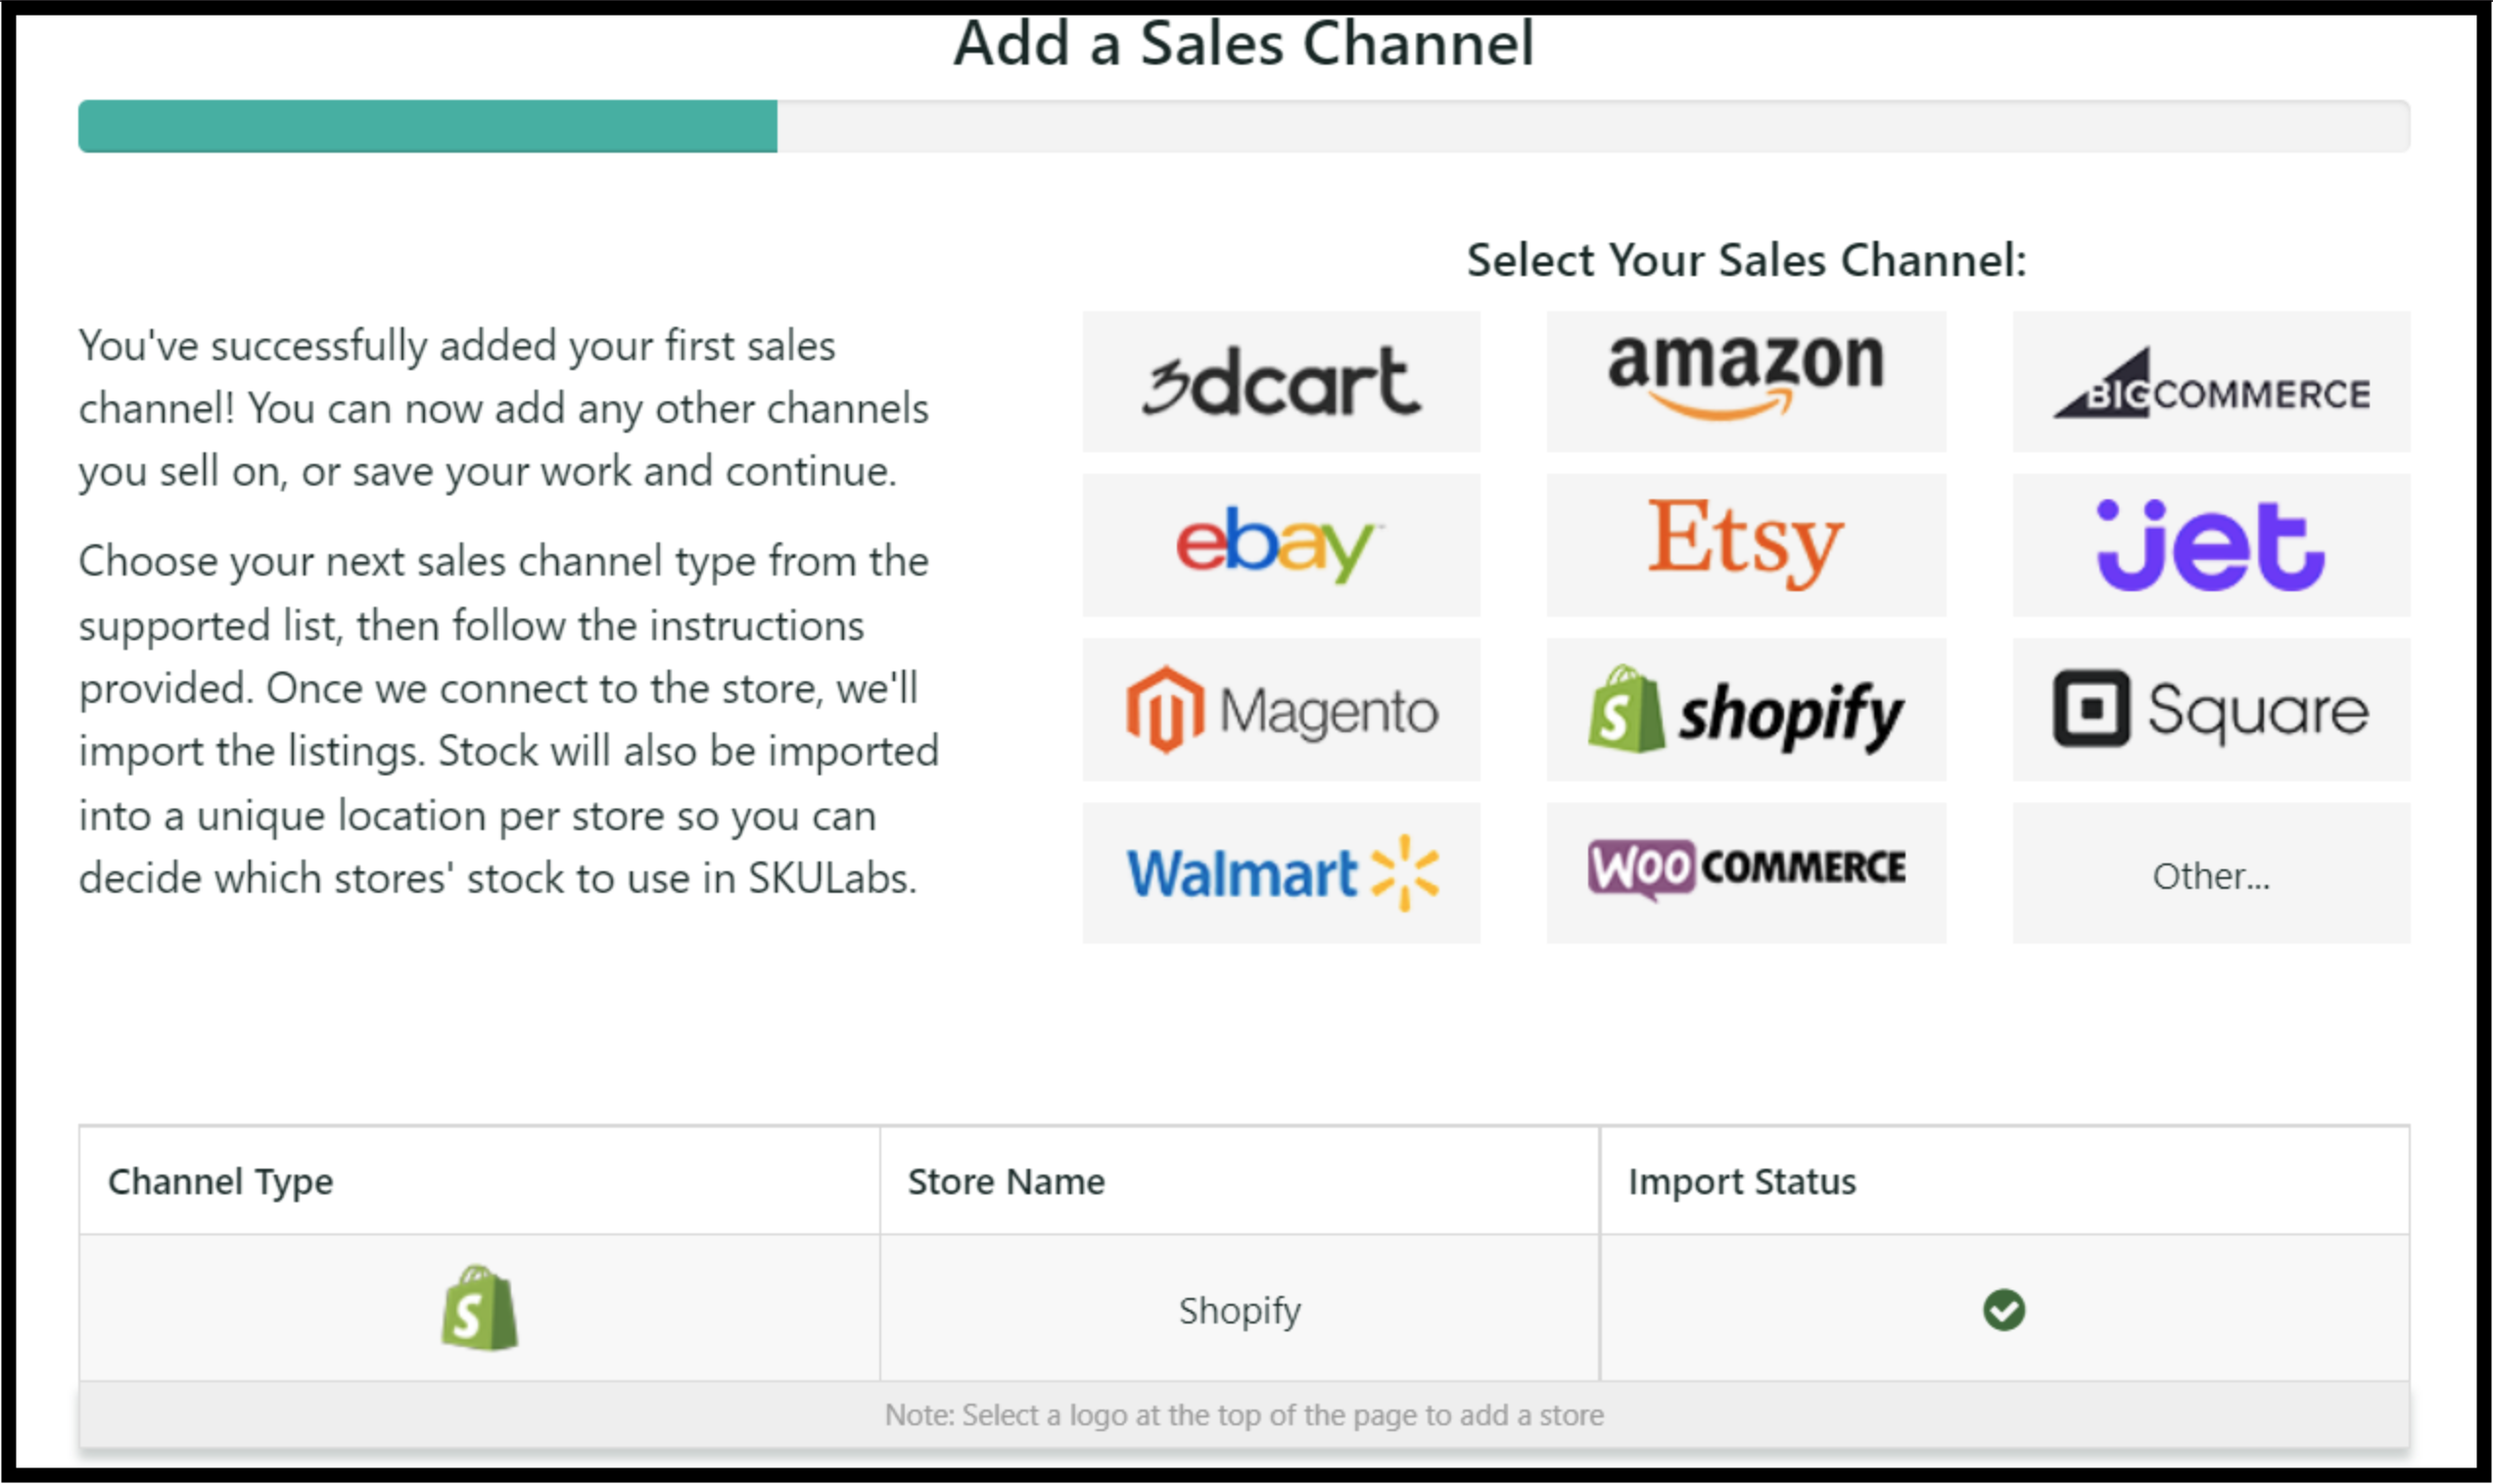
Integrating your eCommerce platforms with SKULabs is a crucial step. The wizard will take you step by step helping to connect your online stores (like Shopify, Amazon, eBay, BigCommerce). This integration allows SKULabs to sync your listings and orders to commence with the initial catalog creation within the app. If you are using multiple sales channels, we recommend connecting first the channel that houses most of your inventory, has the most complete information, and desired SKU #s that you would like to move forward with. You can still continue your day to day operations and fulfill your orders using your previous methods. You will notice SKULabs will move orders from the order processing tab to the shipped tab as your channel status changes to fulfilled or shipped.
At this stage, stock sync is not yet activated and you will be in a virtually read-only mode for your setup and testing purposes.
Stock sync will be the last step in onboarding with SKULabs before going “live” and at this stage we want to ensure all stock levels in SKULabs are what you want them to be.
Step 3: Creating your SKULabs Catalog
Import Your Inventory
You can import your inventory into SKULabs via direct sync from your connected stores (or via CSV if necessary). Make sure your inventory items on your sales channels include essential details like SKU, product names, quantities, and barcodes. Additionally, and depending on your sales channel, make sure these items are active, set to track inventory, and physical (not digital) items. Some channels require at least 1 in stock to consider them an active listing. Keep in mind this is just the initial import to get a snapshot of your catalog. It is often standard procedure to import again and start fresh if any catalog errors are revealed. Avoid creating any kits or doing a lot of manual edits to your catalog at this stage until you have had your first onboarding account review with SKULabs. During this initial onboarding, we will do a thorough review of your account and catalog and guide you through the next steps to simple and accurate inventory control.
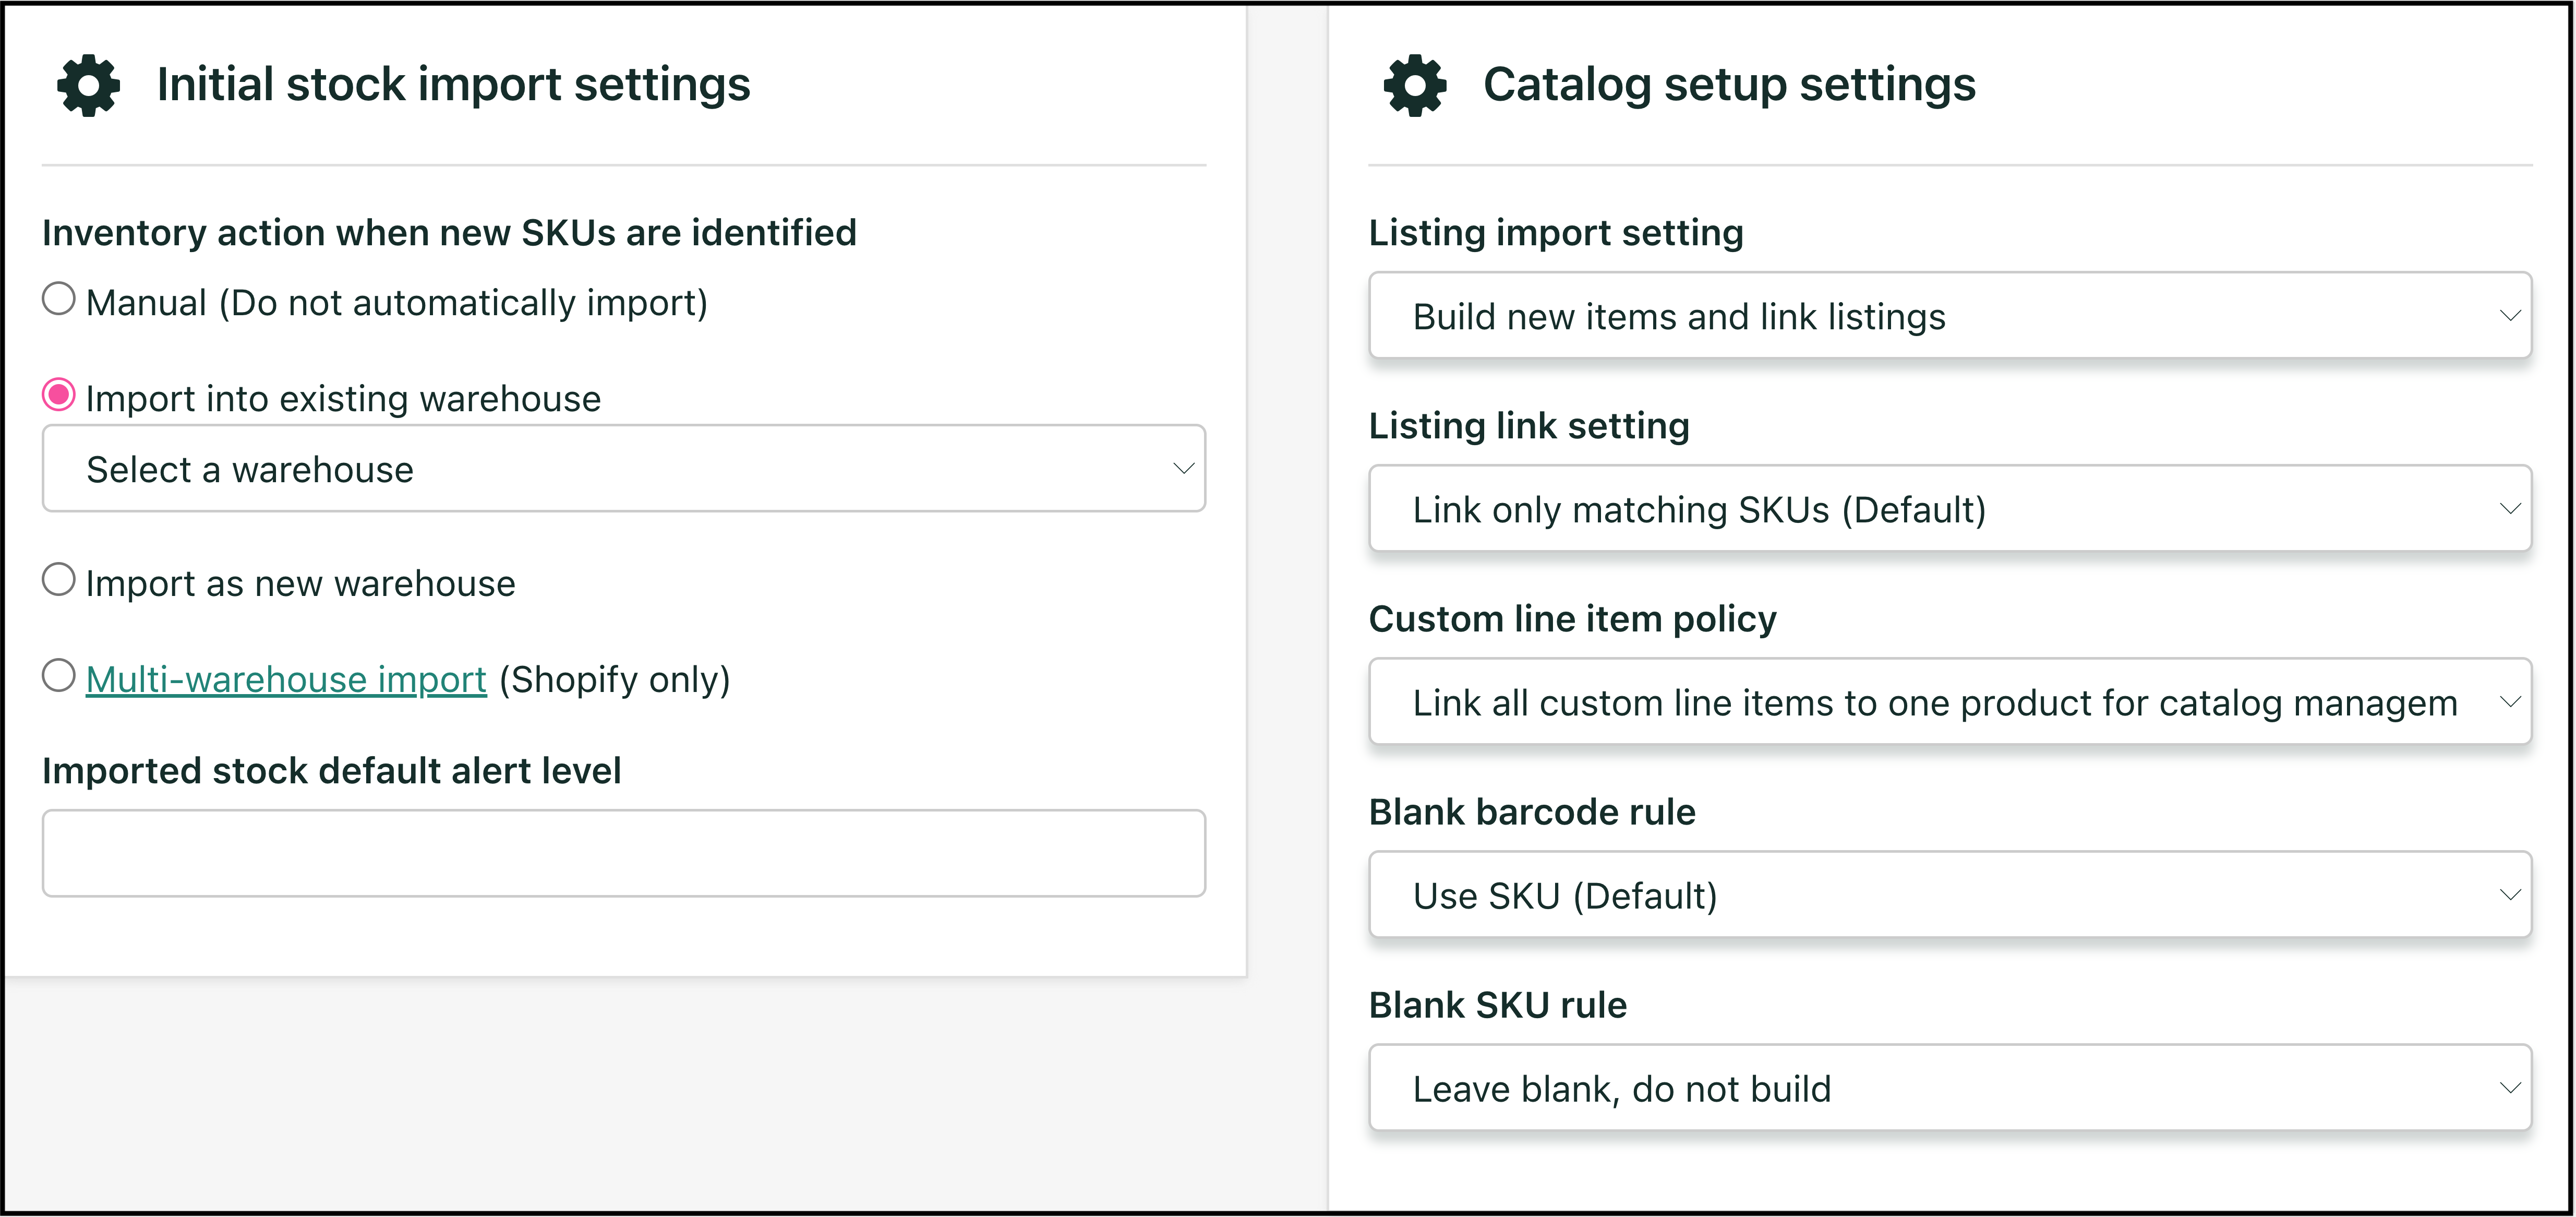
Each store has its own settings to manage the initial import. These settings give you the option to import stock levels from the sales channel, as well as assign them to one of your warehouses. There are also additional settings if you do not have barcodes and would like SKULabs to automatically generate them upon catalog import. Under the catalog setup settings, the “Build new items and link listings” is the default to use if importing items from your channel.
Skulabs will sync item information including inventory levels from your sales channels only upon the initial import of a new listing during catalog creation. This is to help simplify the setup process by giving SKULabs an initial stock count from your sales channel and prevent multiple listings for the same item from overwriting the previous information. This stock sync from the sales channel is not concurrent, and only happens once, upon initial import of a new listing. Once you go live with SKULabs, will we become your master of inventory. We will push the stock levels from SKULabs and overwrite what is on your sales channel. All inventory transactions should be done inside of the app vs sales channel side once stock sync has been enabled on your account.
Out of the box, SKULabs pushes the Free stock levels over to your sales channel(s). Your Free counts are what you have On-Hand, minus any open orders holding reserves on those particular items. This setting works well for most accounts, but of course you can have much more granular control of how this works by utilizing our stock rules to tailor advertised stock to your individual needs. We would be happy to give recommendations upon our your initial onboarding with SKULabs.
Step 4: Shipping and Carrier Integration
Connect your Shipping Carriers
Integrate your supported shipping carriers (like USPS, UPS, FedEx) into SKULabs by following the in-app wizard. This allows you to compare rates, print shipping labels, and track shipments all from one place.
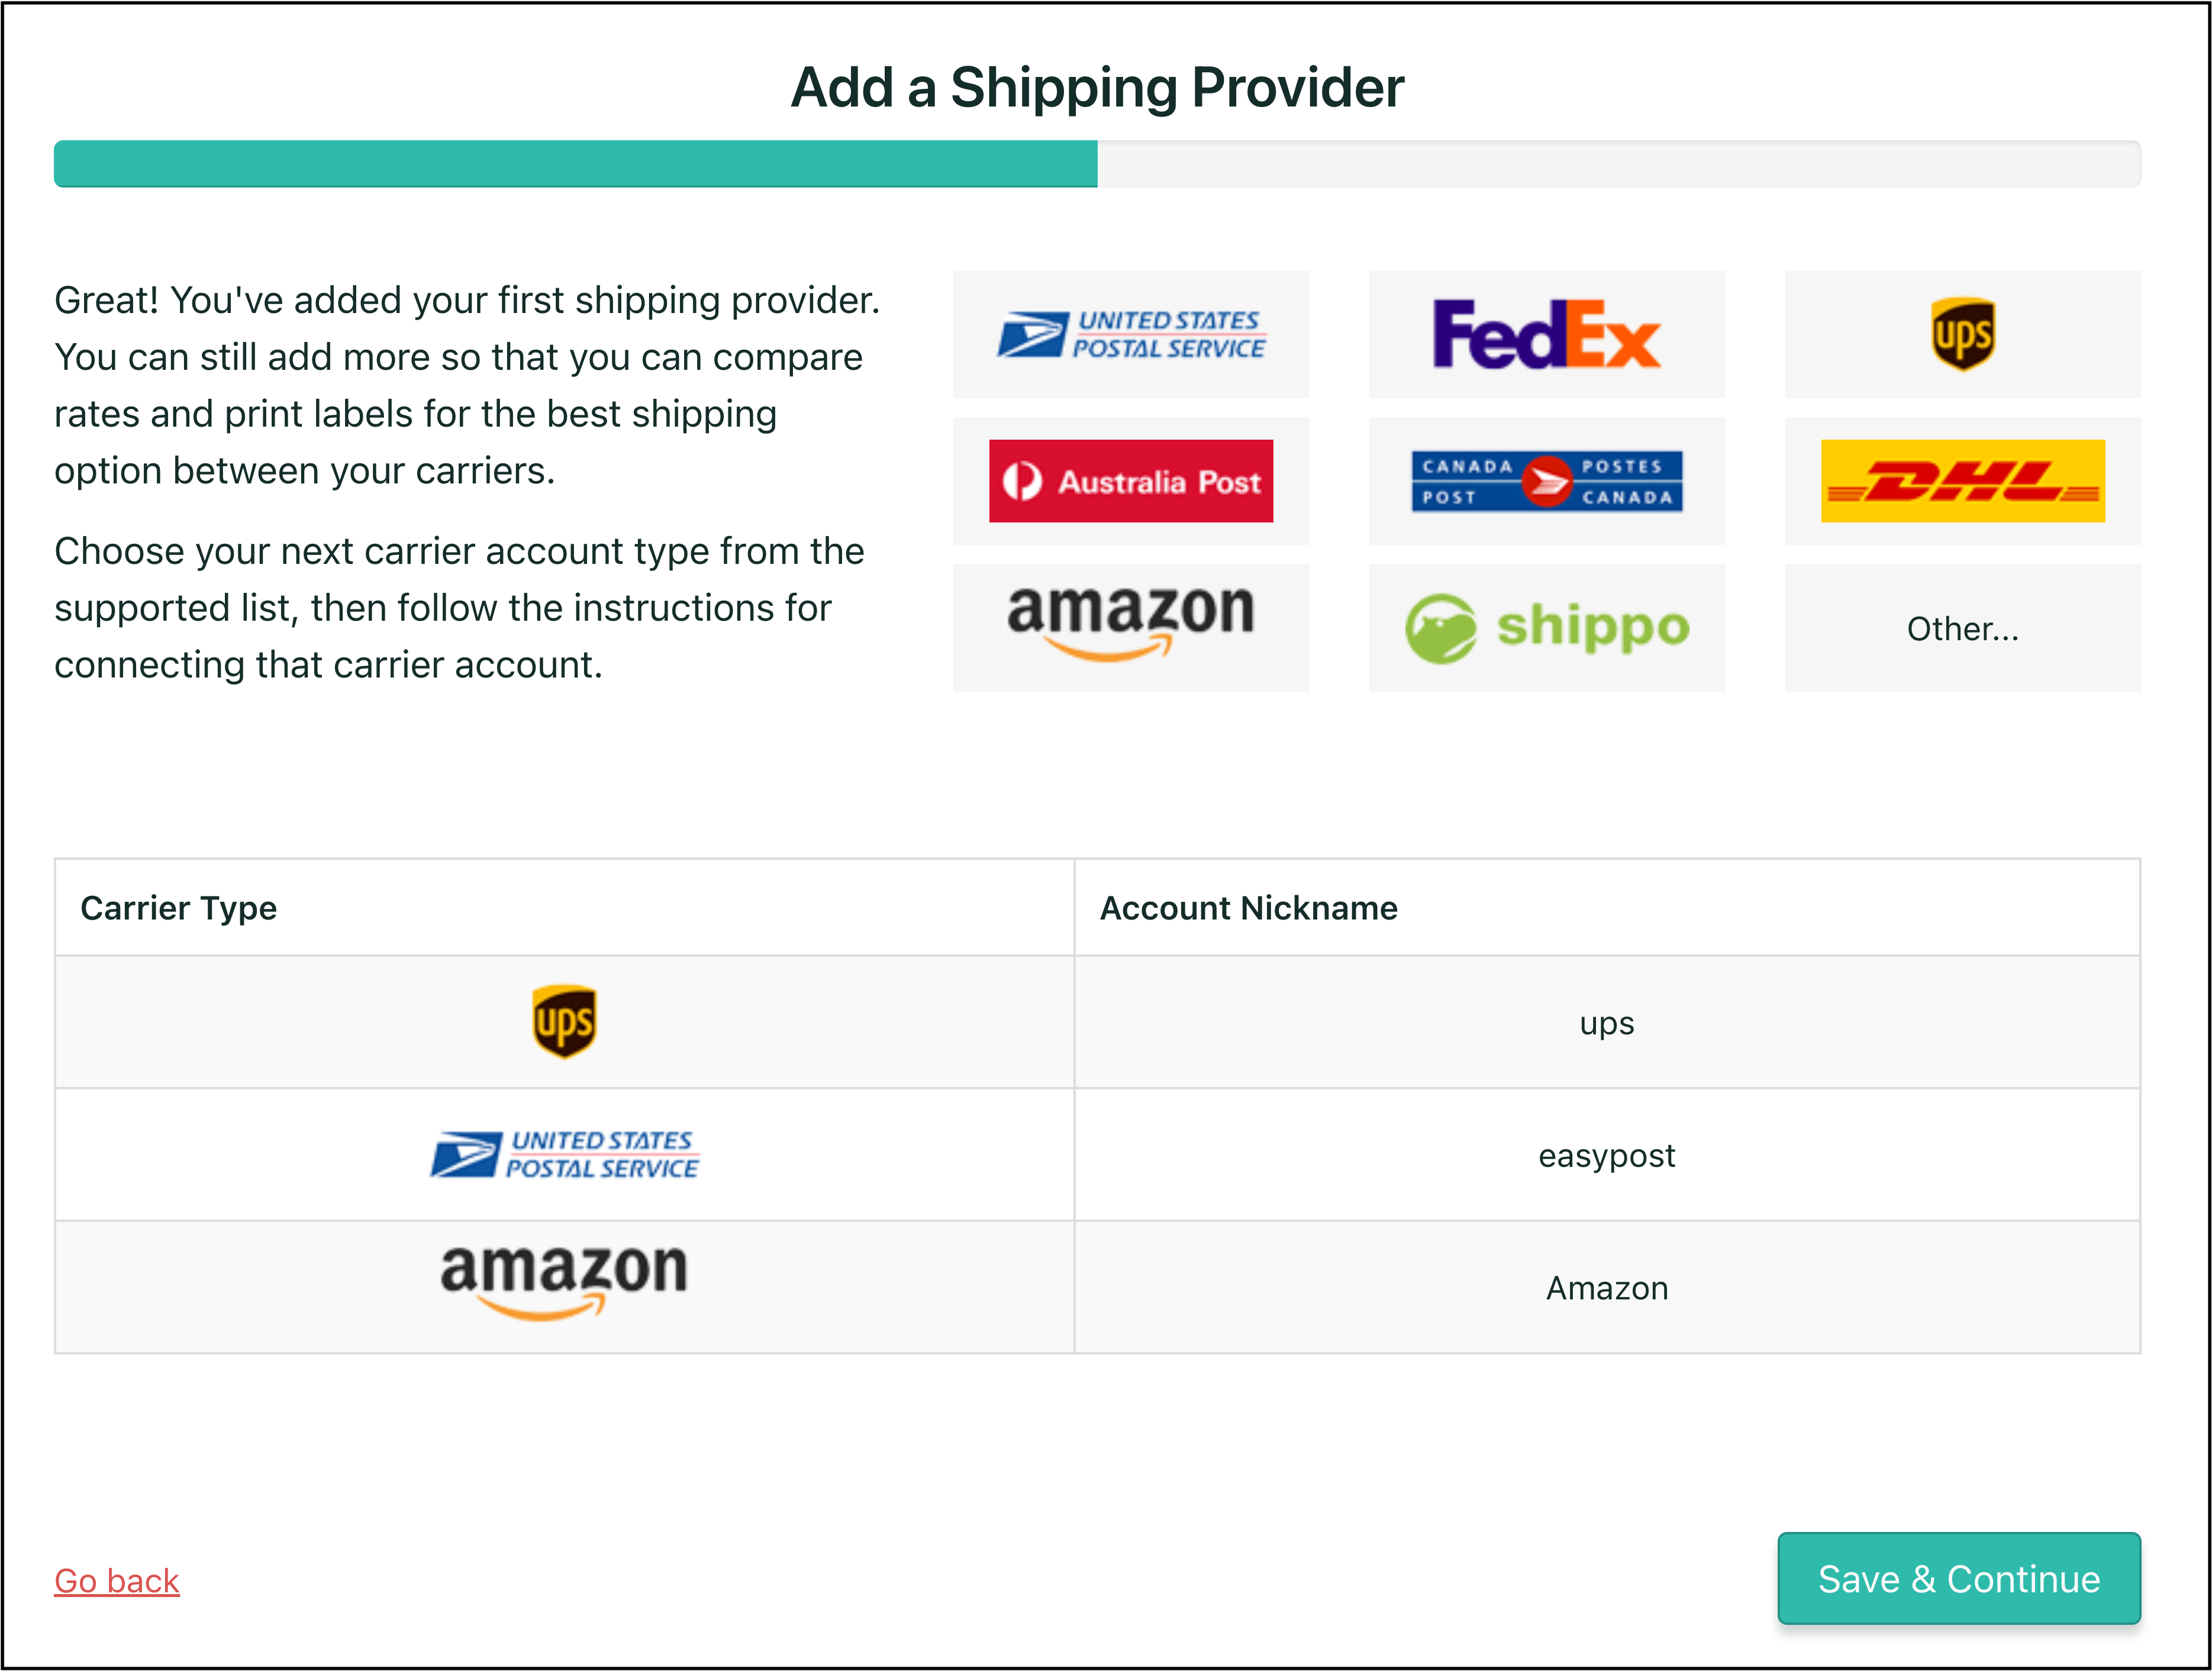
SKULabs offers discounts but you do not have to use the accounts provided. You are free to connect your own accounts if you already have negotiated rates.
USPS:
SKULabs is an official USPS Connect ecommerce partner. We can meet or beat your existing USPS rates with significant CPP and cubic discounts as an industry standard. You can optionally bring your own rates if you already have a USPS contract, just contact us to get started.
FedEx:
SKULabs offers discount rates through the FedEx Advantage program in partnership with both EasyPost and Shippo or using Shippo’s shared account which offers it’s own discounts. It’s just as easy to connect your own FedEx account to keep your volume + existing rates without bothering with our available discount programs.
DHL:
SKULabs offers discount rates using EasyPost’s or Shippo’s shared account. It’s just as easy to connect your own DHL account to keep your volume + existing rates without bothering with our available discount programs.
Can I use my own accounts?
Yes! It’s easiest to connect your own accounts into SKULabs and it’s what we prefer. Keep your volume! We’re not a shipping aggregator who requires you to offload your shipping volume to SKULabs to benefit from our software.

Step 5: Printer Setup
Connect your printer to your workstation with PrintNode
The next step in your onboarding journey is to set up your printer to one of your workstations. This will enable all devices connected to your SKULabs account access to the printers. SKULabs connects via PrintNode and there are two versions available. One for Windows, and one for Mac. Make sure your are downloading the PrintNode app directly from our Printing and Scales article as these versions of PrintNode are tailored for SKULabs only. If you have previously used PrintNode or any other printer connectivity applications, it is best to uninstall these first before installing the SKULabs version of PrintNode. Once installed, you will see the app running on the host computer in the task bar. You will see a little orange, white and green icon.

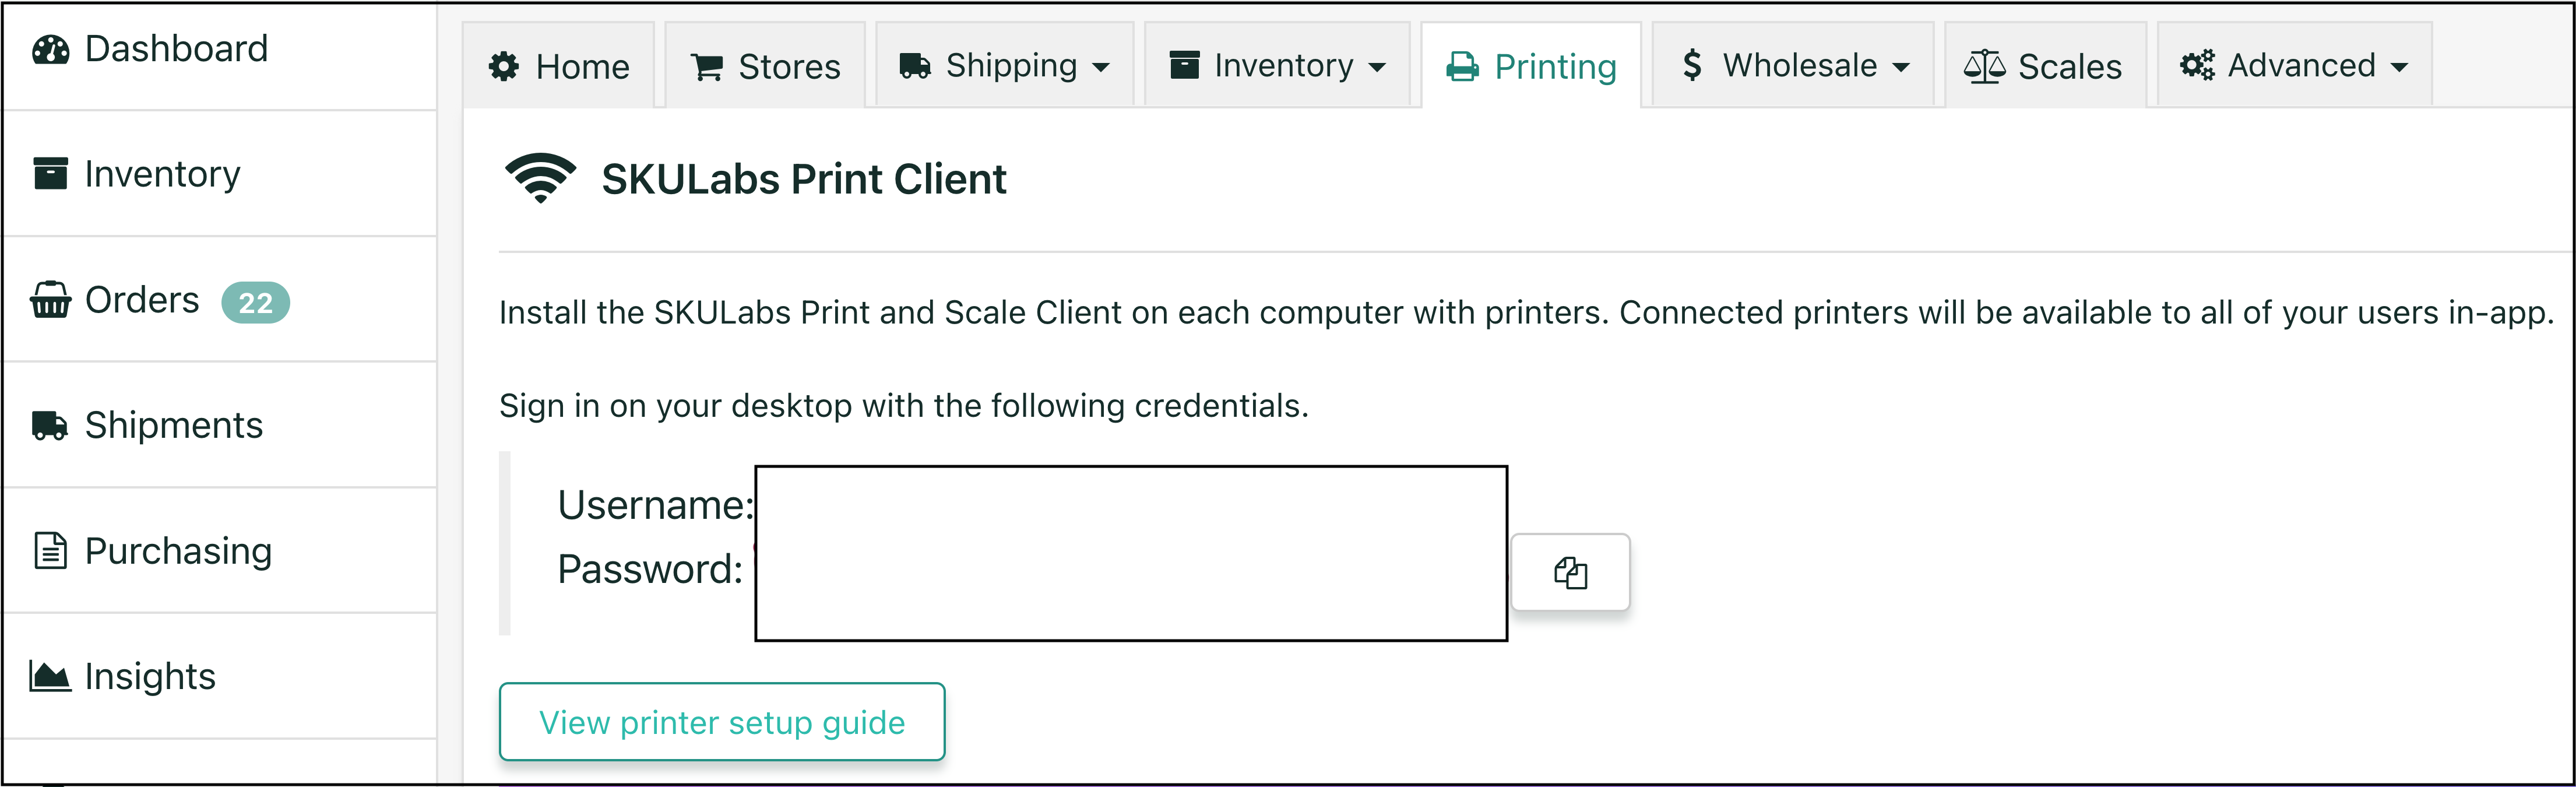
Double click the icon to open it and sign in using the Login credentials located in SKULabs app [Settings tab > Printing tab]. Find the user name and password here and use these to log into the PrintNode app.
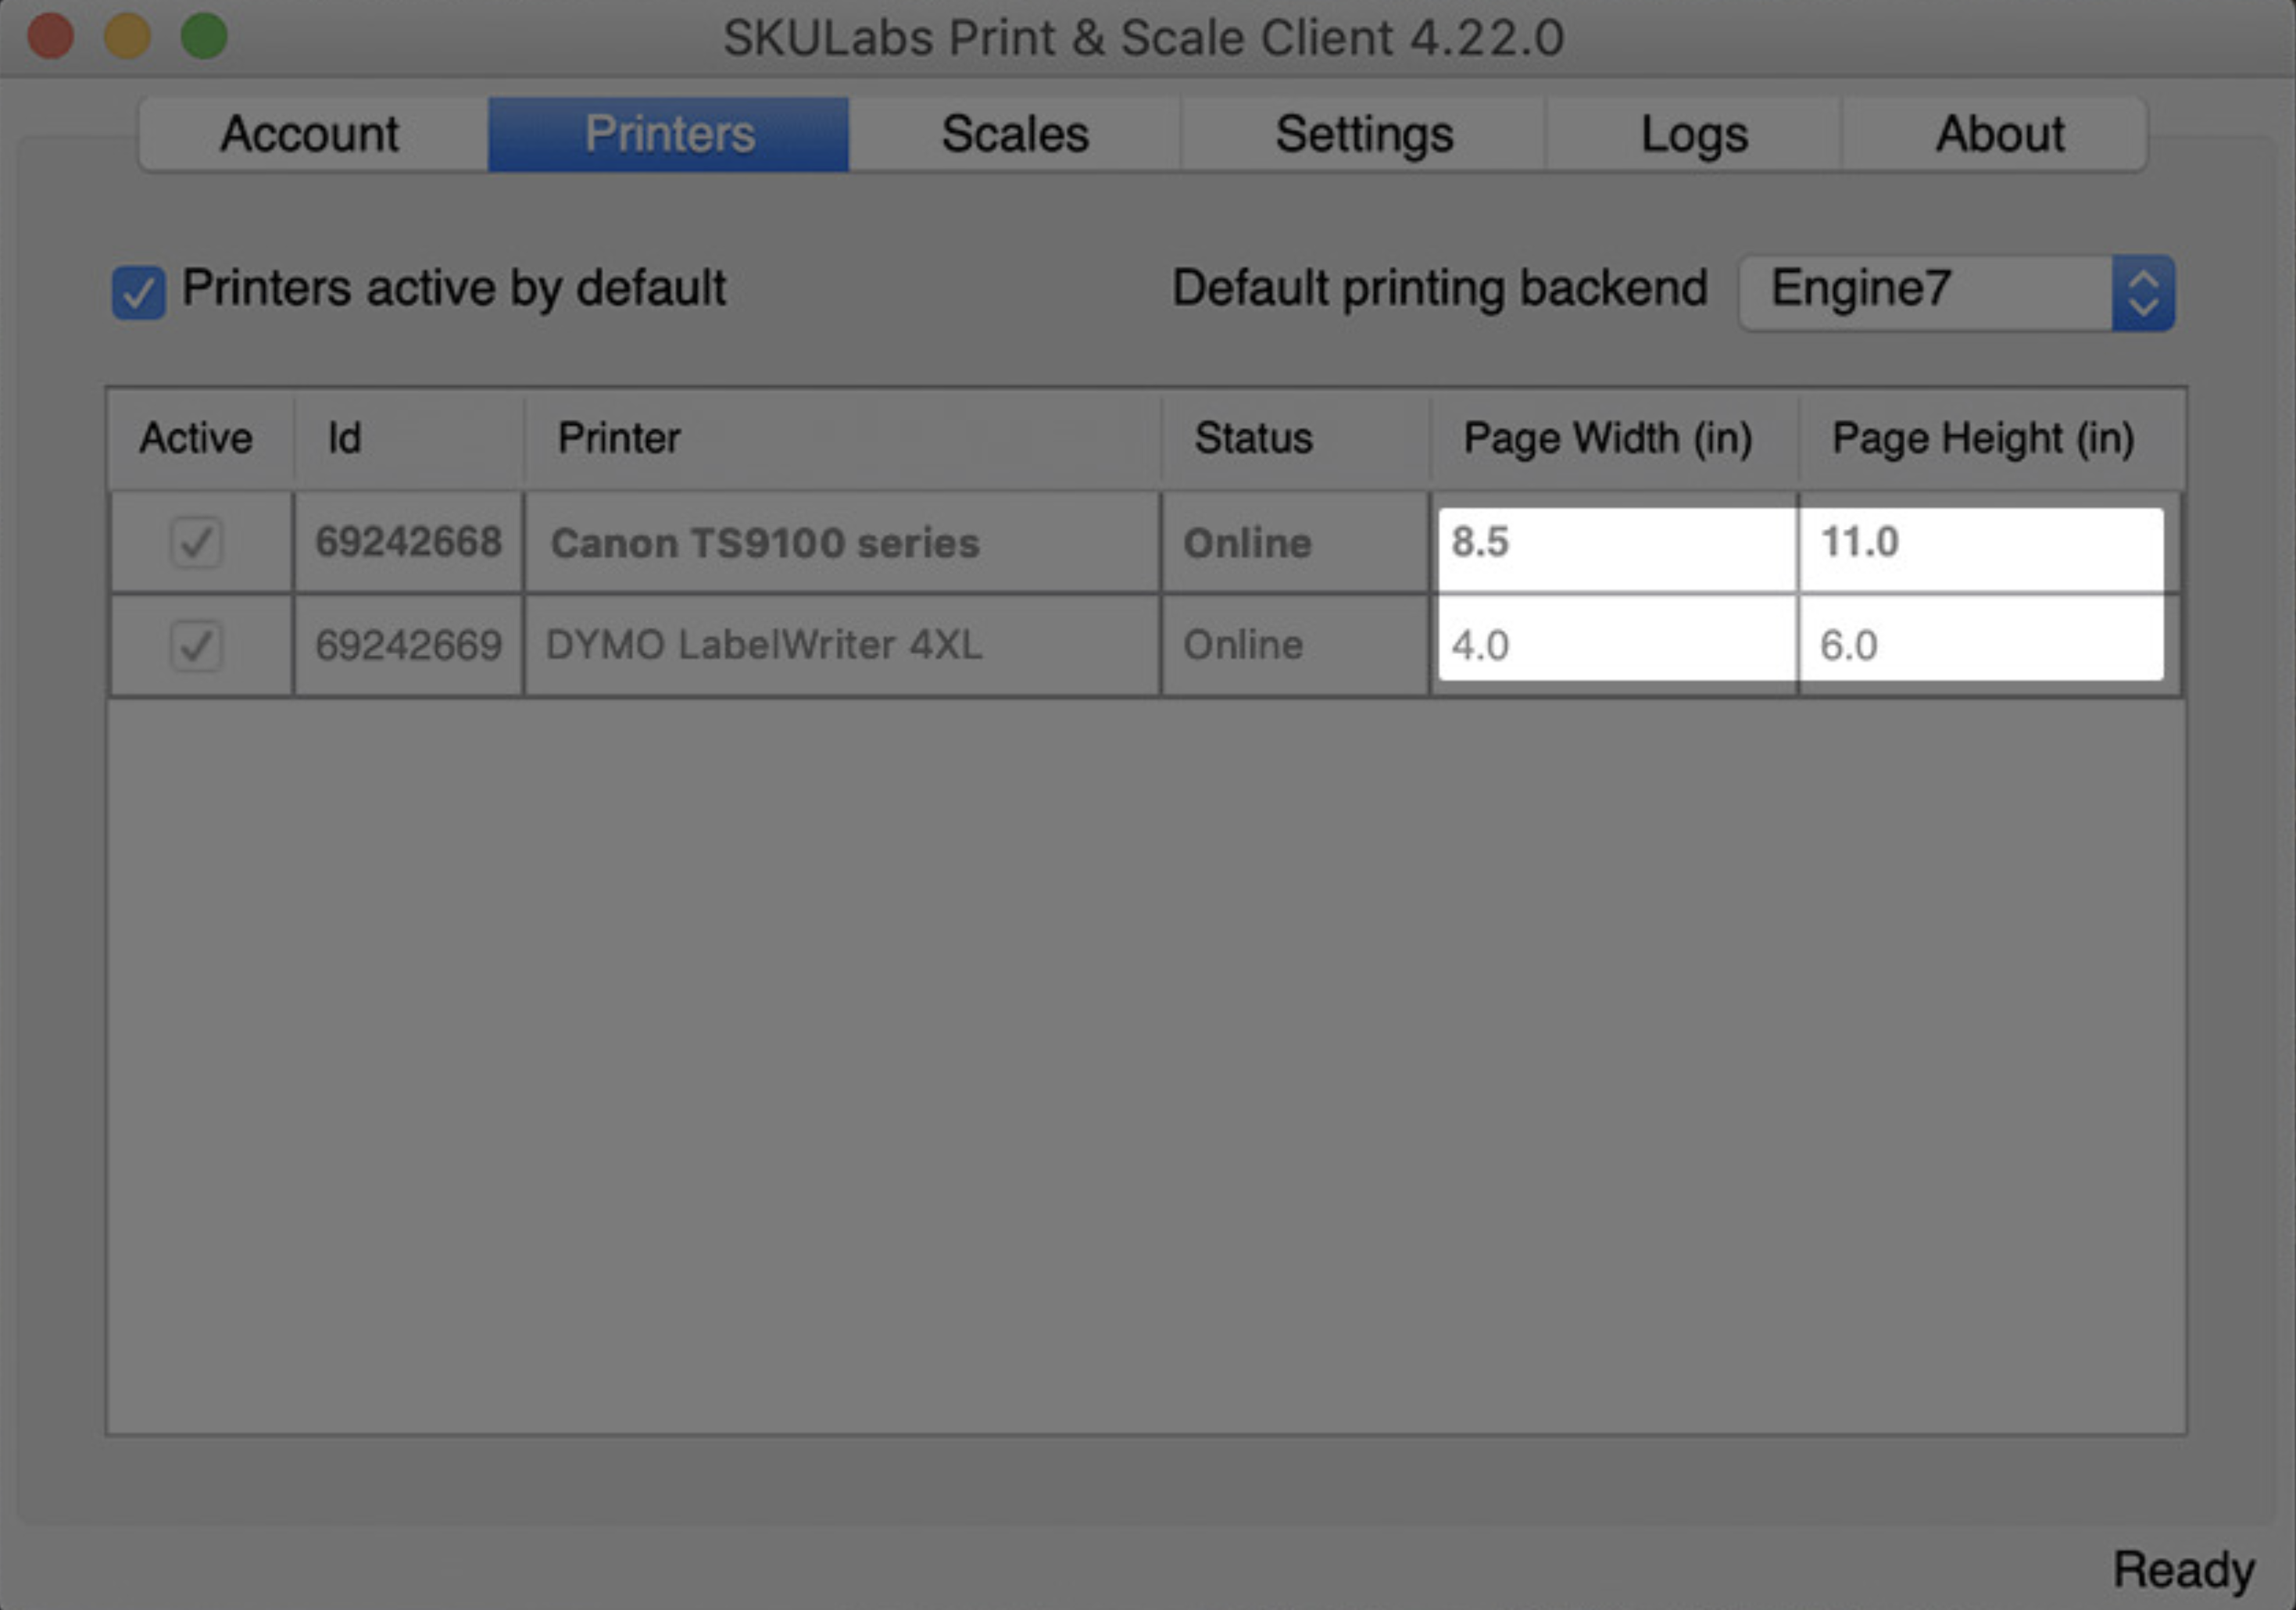
Next make sure you see your printers listed, then configure your page width and height to your desired settings. Ensure the host computers internal print settings are a match to avoid discrepancies. Need help troubleshooting? Here is our guide on common printer setup questions.
Step 6: Familiarize Yourself with the Interface
Getting to know the Tabs
The SKULabs Orders tab gives you an overview of orders needing processing and what stage of processing they are currently in (Internal Order Status). Familiarize yourself with the interface and learn how to navigate through different sections like orders, items, listings and reports.
In the Inventory Tab, you will see three different tabs on the dashboard in regards to the products you sell, Basic, Advanced, and Listings.
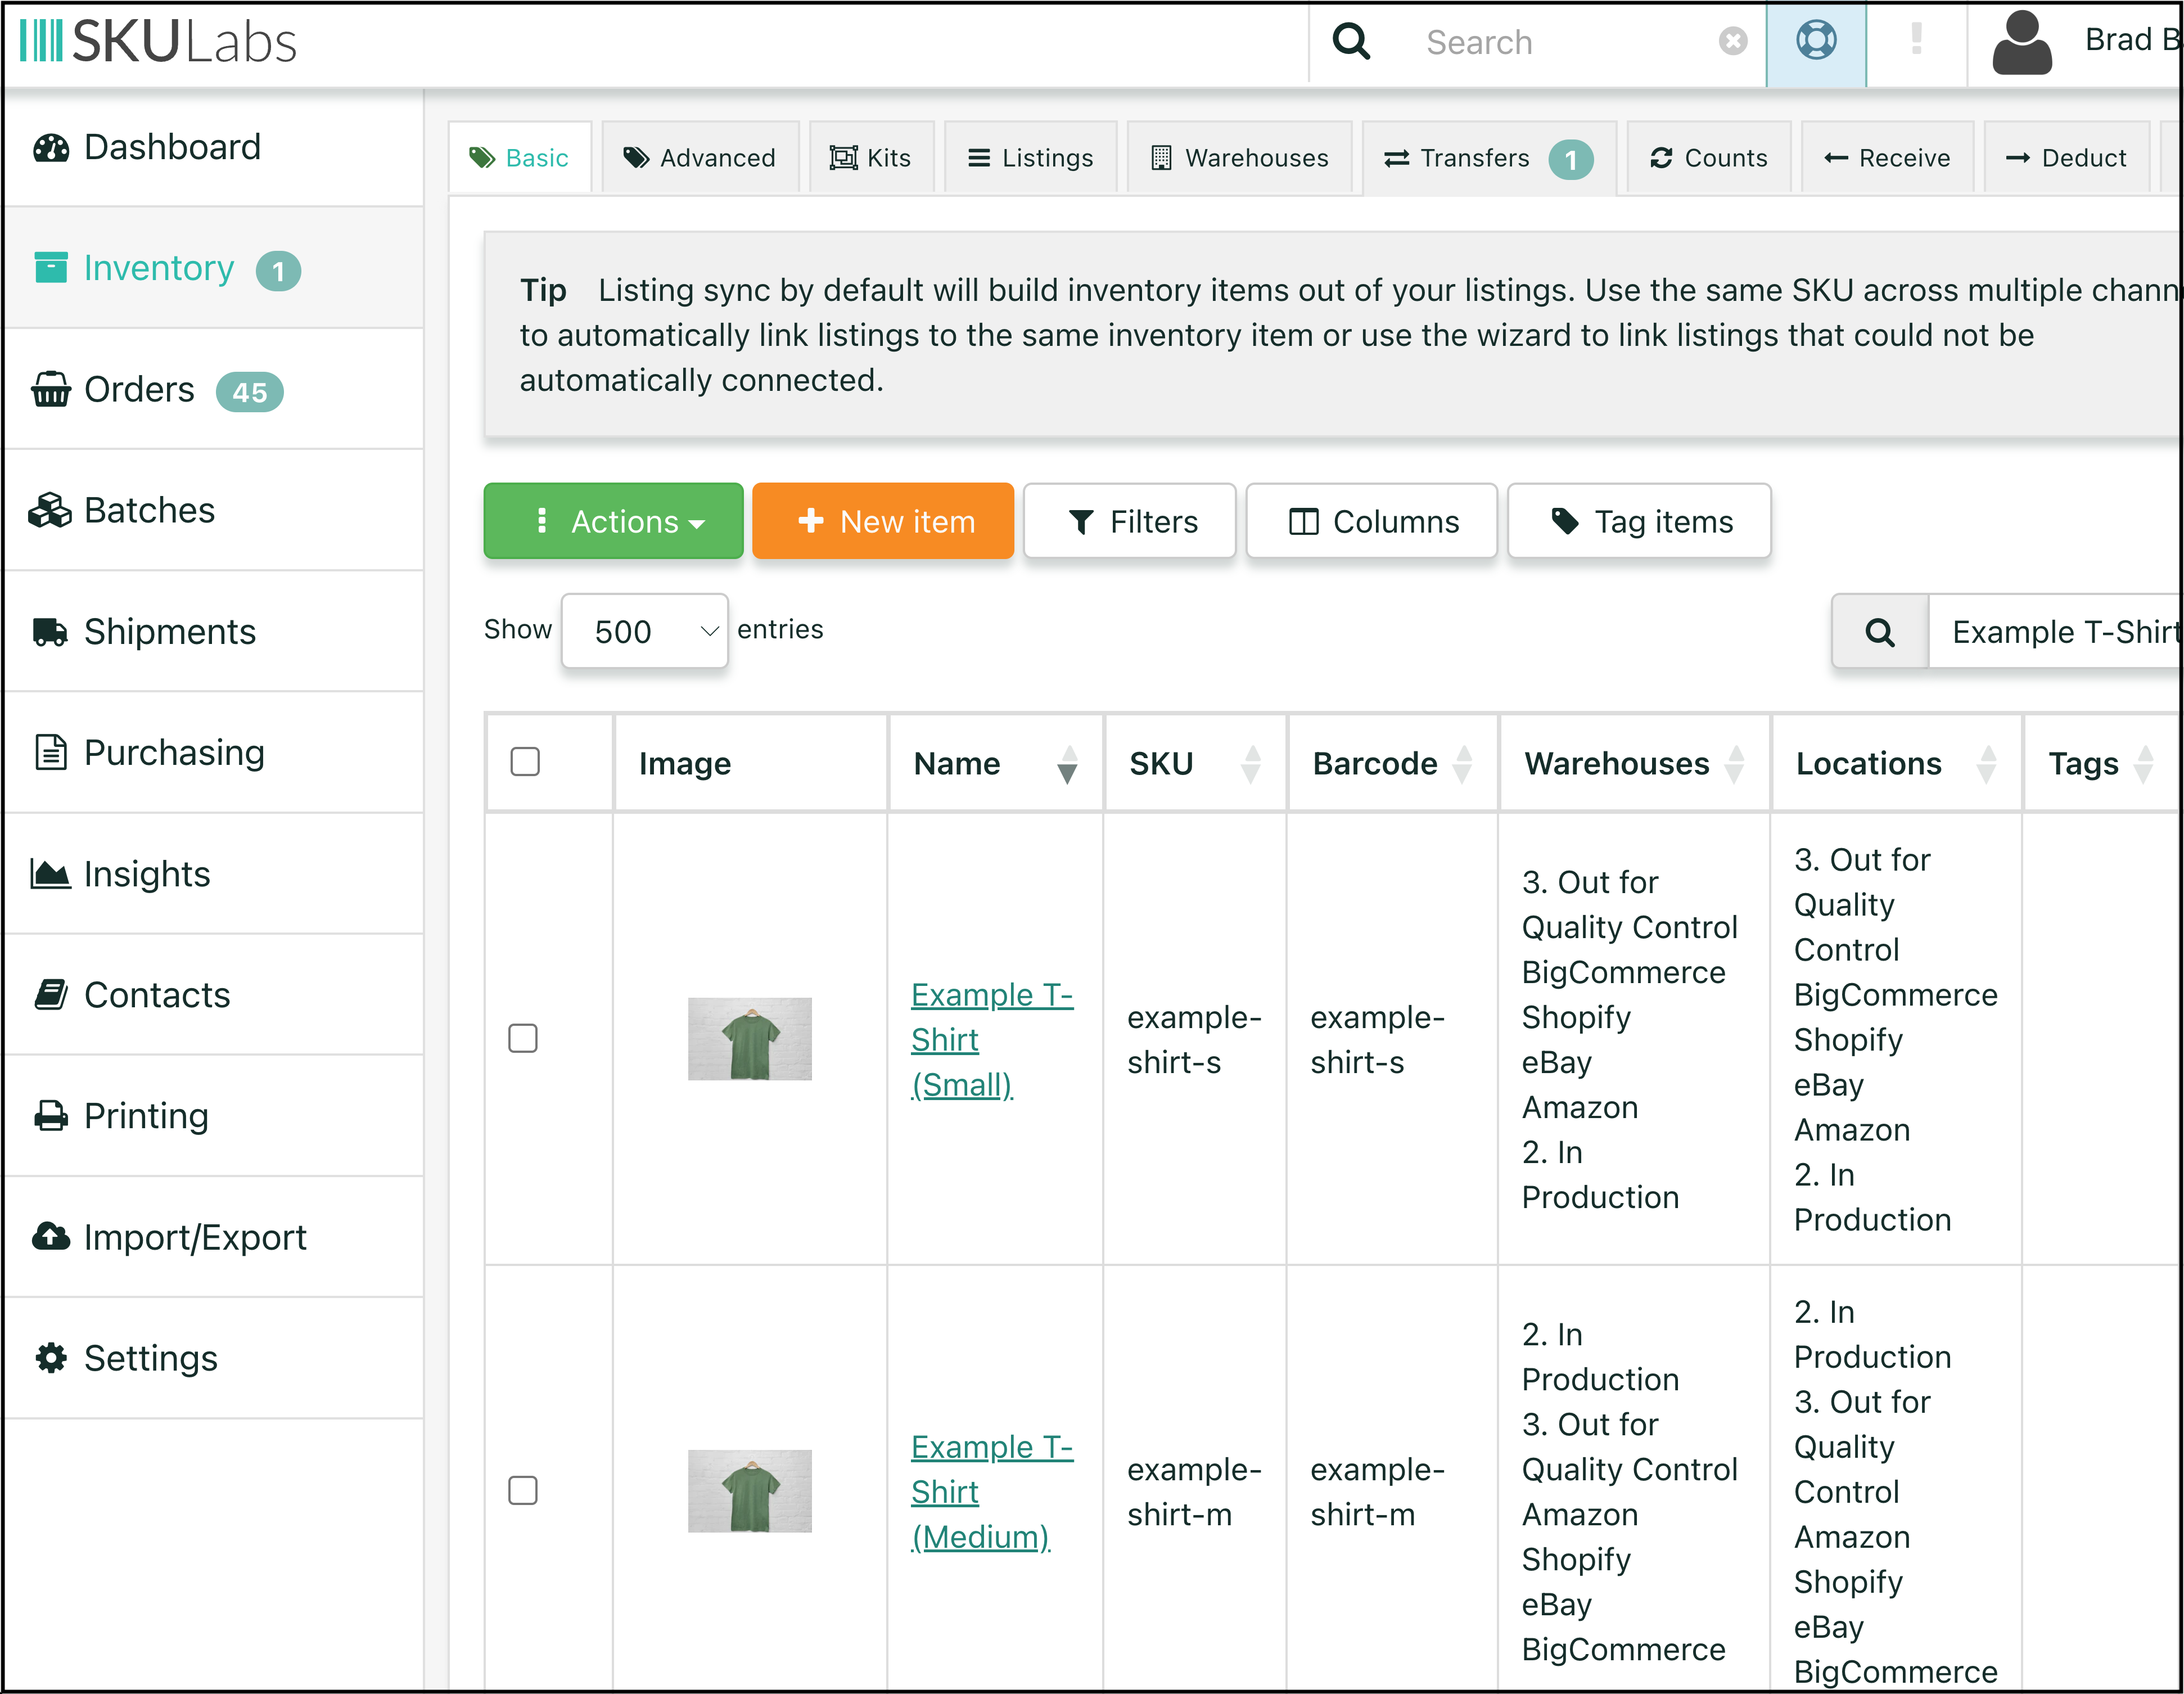
Basic Tab: This tab is your item catalog inside of SKULabs, this represents all of the physical items you carry and various customizable information about each of these items. Refer to your columns tab and your filters tab to select the preferred information visible on this page. Additionally these columns can be drag and dropped to customize your views to your preference. This is the quick lightweight view of inventory which can be speedier than the Advanced depending on the size of your catalog.
Advanced Tab: This is an additional tab that displays your catalog as well, but has much more filtering, actions and reports located within. Most customers use this tab for their in-depth filtering and use the basic tab if they are just looking for something simple. These two tabs keep you from having to constantly adjust pre-set filters when looking for an item by giving you an additional tab for browsing.
Listings Tab: Not to confuse this tab with your items. This is a tab that represents the listings that SKULabs “sees” from across all of your sales channels. Multiple listings can be attached to a single inventory item within SKULabs.
New items will always be added to your sales channel first. Once new items have been added to the channel, simply run a listing sync from your dashboard. SKULabs will import the item, create the item in your catalog, automatically attach it to the listing on the sales channel, and will be ready to accept new orders!

Congratulations!
You have now completed the initial steps in your onboarding with SKULabs. You have connected your sales channels, imported your catalog, set up your shipping carriers, connected your printers, watched the webinar, and browsed through the app to familiarize yourself on how to navigate!
Embarking on your SKULabs journey is an exciting step towards more efficient and effective inventory management. Remember, the key to success with any new tool is patience and flexibility. A lot of softwares will accomplish the same thing yet the methods might not be exactly similar. Don’t hesitate to reach out to SKULabs support for any questions or guidance. Here’s to the beginning of a more organized, streamlined, and successful business operation with SKULabs!
Connect with SKULabs Today
Now is the perfect time to discuss how we can help you get prepared for taking your business to the next level!
If you have already signed up, and ready to schedule your first onboarding with SKULabs, feel free to follow this link here!
If you have not spoken with us yet, chat with one of our experts today. Schedule a meeting or give us a call at 1800-243-2986 to learn more.
Completing these steps are not a hard requirement to reach out and schedule. SKULabs was designed to be intuitive throughout the app and features the in-app wizard to guide you along the initial steps. Let us know what you think and we look forward to speaking with you soon!